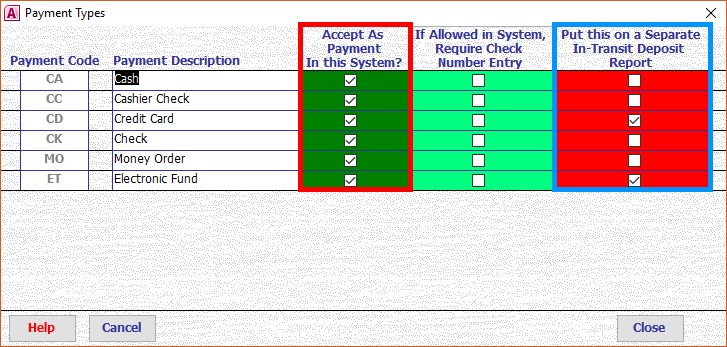
First, you will need to confirm that Electronic Transfer is a valid payment type. Payments marked Electronic Transfer/Electronic Fund will appear on your deposit report separately.
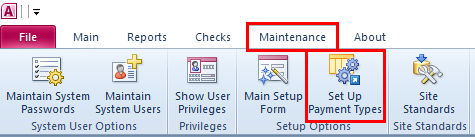
- From the Cash Book section of the software, select “Maintenance” and then “Set Up Payment Types”.
- Enter the admin password.
- Make sure that “Electronic Fund” is selected under “Accept As Payment In this System?”
- Make sure that “Put this on a Separate In-Transit Deposit Report” is selected.
Next, you’ll need to set up the deposit as a receipt type.
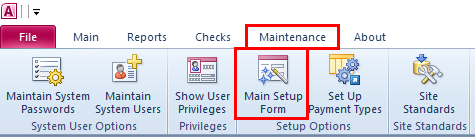
- From the Cash Book section, select “Maintenance” and then “Main Setup Form”.
- Enter the admin password.
- Select “Receipt Type Setup” from the right-hand side of the menu.

Then, add a new row to the bottom of the Receipt Types menu.
- Create a unique two-character code for the receipt type. For example, an ACH Payment might be “AP” or “SV” (State Voucher).
- Enter the description of the receipt type (for example, “ACH Payment”).
- Select “General Deposits” from the drop-down menu.
- Select “Cash Book” from the drop down menu.
- Leave boxes 5 and 6 blank.
- Hit “Exit” to save your changes.

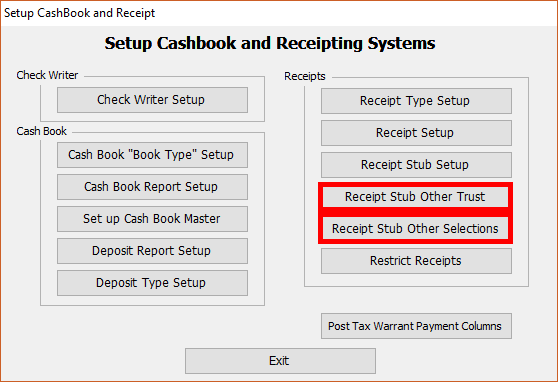
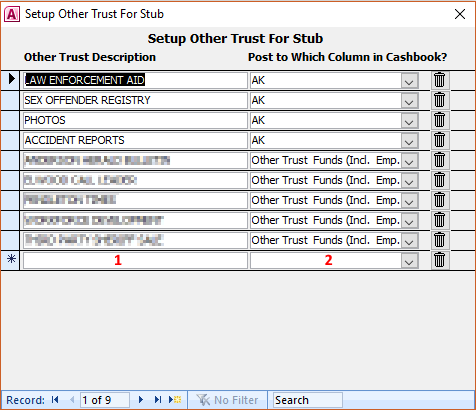
Once you have added the receipt type, you will need to associate it to the correct column of the cash book.
- Select either “Receipt Stub Other Trust” or “Receipt Stub Other”.
- Enter the name of the new receipt type to the left-hand side of the menu.
- Select the column the money should be deposited to from the right-hand drop-down menu.
If only certain users should be able to enter ACH payments, you can restrict access to it. By default all users can access all receipt types. If you have done any restrictions in the past, any new receipt types will have to be added to their permissions.
- From the Setup Cashbook and Receipting Systems menu, select “Restrict Receipts”.

- Select “User’s Receipt Types”.

- On the left-hand side of the menu, select the username of the individual who needs to be given access.
- On the right-hand side of the menu, select the receipt type the user can use.
- Repeat for every receipt type the user can access. For example, in the below image, user “emartin” can only enter in receipts for Background Checks, Gun Permits, and Incident Reports. She will not be able to enter in receipts for ACH payments, Sheriff Sales, or any other types of receipts in the system.


